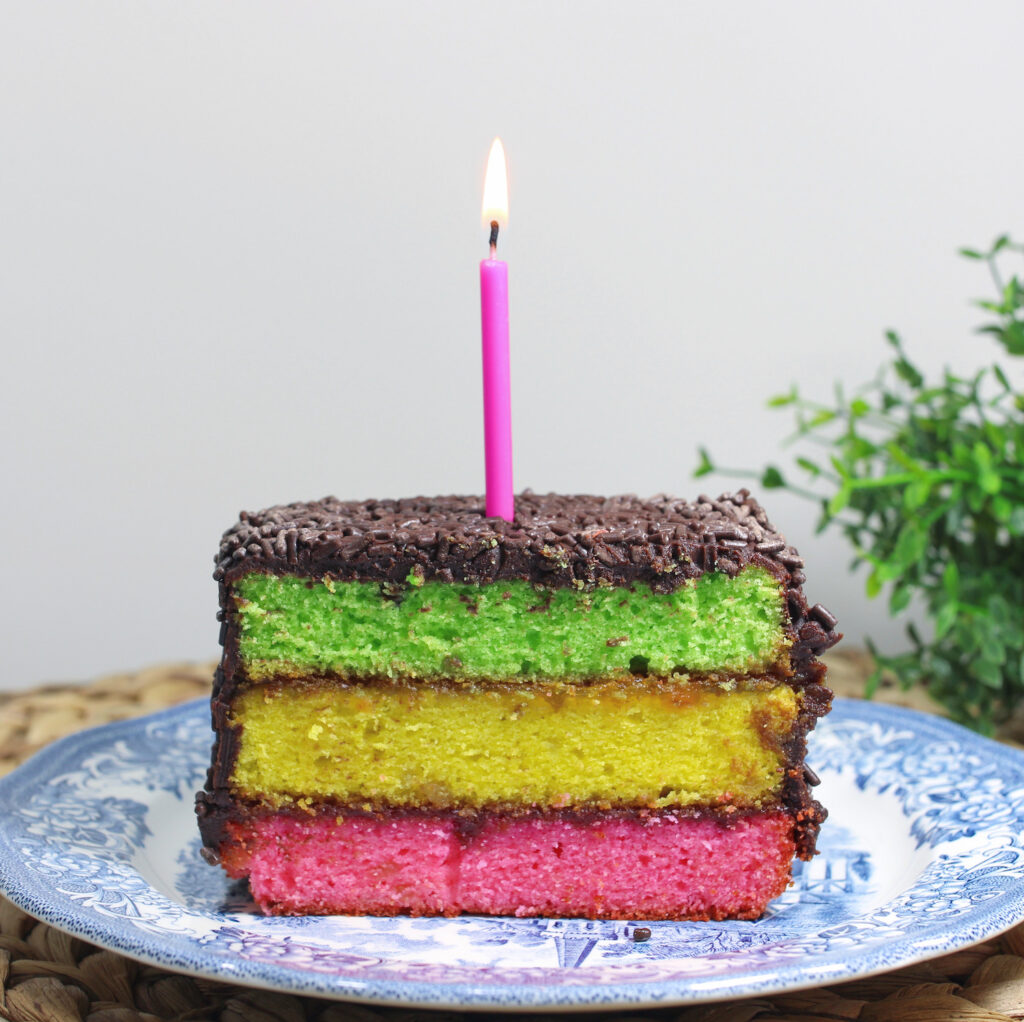
This is the absolute BEST rainbow cookie cake recipe. It’s easy enough for beginners to handle with the flavor profile of an expert.

When I was younger, rainbow cookies were my absolute favorite. I guess it must be hereditary because now the kids love them just as much.
How It Started
During the planning phase for my daughter’s third birthday, I asked her what kind of cake she would like.
Without missing a beat, she screamed “rainbow cookie cake!”
If anyone’s a fan of oversized sweet treats oozing with hints of almond, fresh preserves, and chocolate – it’s me.
Despite this, I sat quietly for a few seconds to try and come up with the nicest possible way I could tell her that Mama had no clue how to make that.
Instead, I said “Okay…rainbow cookie cake it is!”
I saw two scenarios taking place.
- Try to make it. Completely fail with wasted ingredients. Buy rainbow cookie cake at the bakery.
- Try to make it. It comes out great. My daughter gets exactly what she asked for.
Worst case scenario, I lose money and time. Best case scenario, I gained a new skill. Either way, she was going to get the rainbow cookie cake.
The Rainbow Cookie Cake Learning Curve
I made a rainbow cookie cake 3 times before deciding on a final recipe and baking process.
The First Cake
The first attempt was totally fine and actually turned out quite delicious BUT it took literally forever.
I was in the kitchen for 5 hours for one cake.
That first cake was the cake served for her actual birthday celebrated at home with just our immediate family.
It was delicious. Right after we devoured it, I swore I’d never make it again. (That lasted about a week)
The Second Cake
My second attempt at the rainbow cookie cake was specifically aimed at cutting down on baking time.
I don’t know about everyone else but on no planet do I have five hours to spend in the kitchen on one item unless there’s a blizzard and I’m stuck home with nothing to do.
This time around, I had produced a similarly delicious cake in 90 minutes. Instead of cooling and decorating the same day, I stuck the layers in the fridge overnight not even bothering to remove them from the cake pans.
The next morning, I took the pans out of the fridge and removed the cake layers onto separate pieces of parchment paper.
I leveled and assembled the rainbow cookie cake layers while it was still cold and left the freshly assembled cake unfrosted on the counter for a few hours until it came to room temperature.
After frosting with chocolate ganache, I stuck it in our full sized garage freezer just long enough for the chocolate to harden.
The rainbow cookie cake has the best flavor and texture when it’s at room temperature and not refrigerated.
The issue here is that if the cold chocolate ganache is left on a counter in a house that is a bit warmer (76 degrees and higher) or humid for too long, the ganache might begin to sweat which can be gross.
Because I didn’t run into any significant problems, I considered this attempt a success.
The Third Cake
Now that I had the timing and overall assembly process down, I wanted to tweak the recipe to make it the best it can be.
I made some changes to measurements and ingredients. The recipe you have here is the one I had settled on for the final product.
Tips for Making the Best Rainbow Cookie Cake

Get disposable pans from the dollar store.
I only have multiple pans of varied shapes and sizes because I’m regularly in the kitchen.
If you’re not an avid baker, just get the throw away pans. It’s cheaper, doesn’t take up any cabinet space, and makes cleaning up quick and easy.
Bake the layers the night before and store them in the refrigerator.
There are “waiting periods” involved in-between baking, cake assembly, and frosting where things need to cool off.
Doing the baking the night before cuts down on the tedious aspect of it all.
Invest in a long serrated knife to level the cake layers.
It helps tremendously to have a proper knife that’s up to the task.
You can find a 10″ serrated bread knife on Amazon for less than $20. It’s what I use for all of my fresh bread and cake slicing.
Gel food coloring works so much better than powdered.
I rarely give my kid anything with artificial food coloring in it for lots of reasons but this is an exception.
I have yet to find a naturally derived food coloring agent (powdered or otherwise) that doesn’t lose it’s color vibrancy when exposed to temperatures above 200 degrees F or just comes out looking like an entirely different shade that what you started with.
The colors in a rainbow cookie cake need to pop.
For this recipe, I used Wilton Gel Food Coloring found on Amazon or in craft stores.
Tools You May Need
- Three standard 9×5″ loaf pans -or- three 8″ cake pans
- Stand mixer or hand mixer
- Different sized mixing bowls
- Measuring cups and spoons
- Knife or kitchen shears for cutting the almond paste
- Small pot to melt chocolate
Ingredient List
Cake layers:
- 4 eggs
- 8oz almond paste
- 1 teaspoon pure almond extract
- 1 1/2 cups sugar
- 2 1/2 cups unbleached all purpose flour
- 1 teaspoon baking powder
- 2 1/2 sticks salted butter, softened to room temperature
- Pink, yellow, and green gel food coloring
- Wilton Bake Easy Non-Stick Spray
Used during assembly:
- Seedless raspberry jam or preserve
- Apricot jam or preserve
Chocolate ganache:
- 1/4 cup heavy whipping cream
- 1/2 cup semi sweet chocolate chips
- Chocolate sprinkles
Best Rainbow Cookie Cake Recipe (Step by Step)
First: Bake the Cake Layers
- Preheat the oven to 350 degrees F and grease the style pan you are going to use.
- Take the 4 eggs and separate the yolks from the egg whites in two separate bowls. You should have 4 egg yolks in one bowl and 4 egg whites in the other.
- Cut the block of almond paste into smaller pieces and set aside.
- Using the whisk attachment on your mixer, beat the egg whites on medium speed until they become frothy – about 3 minutes.
- In the stand mixer bowl, combine the sugar with the almond paste until it isn’t as lumpy.
- Add the softened sticks of butter, egg yolks, and pure almond extract. Beat with the whisk attachment on low-medium speed until well combined.
- In a separate bowl, mix the flour and baking powder together. Change the whisk attachment to the paddle attachment on the mixer.
- Slowly add the dry ingredients to the stand mixer bowl. Make sure the head of the mixer is locked and turn the speed to medium. The dough will become increasingly thick.
- Add the egg whites to the thickened dough while keeping the mixer speed on medium.
- When well blended, shut the mixer off and remove the bowl. Divide the dough into 3 equal sized balls.
- Add pink, yellow, and green food coloring to each dough ball to color the different cake layers.
- Spread the dough into the prepared pans. A wooden or rubber spatula works well for this.
- Bake the layers on the middle rack at 350 degrees F for 20 minutes or until the edges of the cakes start to lightly brown.
- Check the center of the cake with a wooden toothpick or fork to make sure the middle is baked through.
- Let the cakes completely cool in the pans before trying to remove them. I prefer to store them in the refrigerator overnight.
Second: Assemble the Rainbow Cookie Cake
Carefully loosen the edges of the cake from the pan with a butter knife then flip the pan over onto a piece of parchment paper.
Using the long serrated knife, trim the tops of the cake layers so they’re level with each other.
I usually only have to cut off the small rise in the center of the cake to make them even.
Hint: store the cake scraps in a Ziploc bag if you have anyone in the family who would love to be a cake tester. It makes for the best treat!
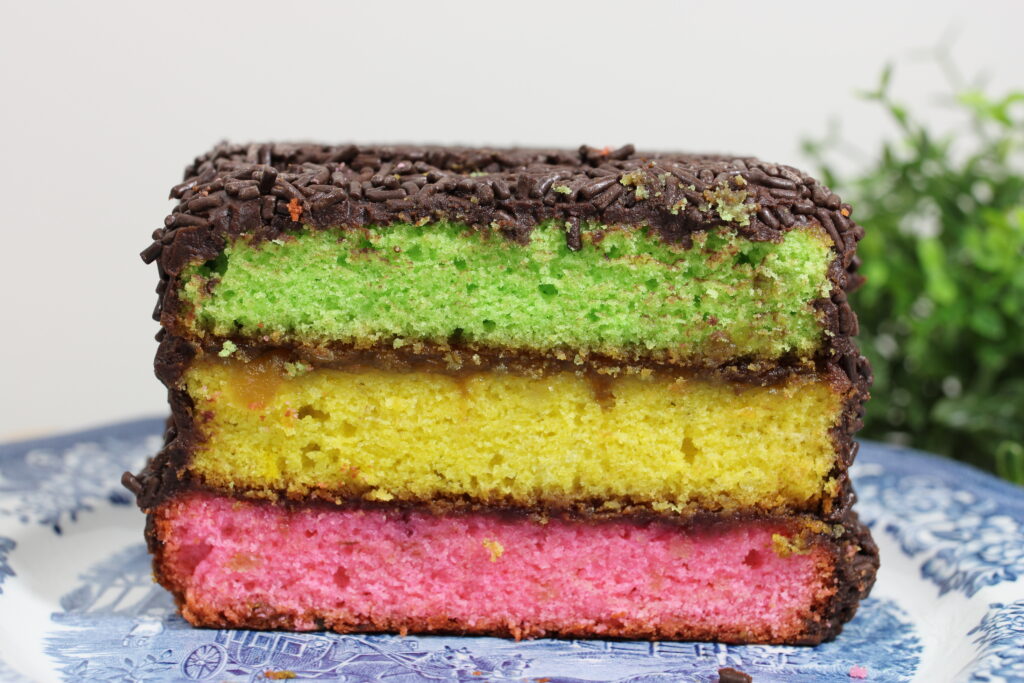
Pink layer of the cake goes on the bottom.
Spread a thin layer of raspberry jam over the pink layer and add the yellow cake layer on top.
Spread a thin layer of apricot jam on top of the yellow layer and add the green cake layer on top.
Wipe away any jam that oozes from the sides of the cake for a smooth, clean appearance.
At this point, you can continue on to frost the assembled rainbow cookie cake or leave it on the counter for a few hours until you are ready.
If leaving it on the counter, id put it in the microwave as is if it will fit. It’s airtight and offers good preservation from drying out.
Use plastic cling wrap with caution as it may cause some parts of the cake to become a bit soggy.
Third: Make and Coat with Chocolate Ganache
Bring the heavy cream up to temperature until it starts to show signs of a boil.
Add the chocolate to the pot and stir until you have a smooth, creamy ganache.
Remove from the heat and immediately apply to the assembled rainbow cookie cake.
The easiest way to do this is to scoop out large amounts of ganache with a spatula and distribute it evenly over the top and sides of the cake.
I usually use 2/3 (if not all) of the ganache. The measurements do make a bit extra on purpose in case I need to do any cake patch jobs.
Some times, even though the layers were flat and even, some spots will look like they’re sagging or have a dent in them. These dents can easily be corrected with a thicker spread. There’s no such thing as too much ganache.
Once the cake is covered, add chocolate sprinkles while the ganache is still warm.
To coat the sides of the cake, I pour sprinkles into my hand and throw it horizontally at the cake wall. It sounds ridiculous but it works well and surprisingly doesn’t make much of a mess.
Put the finished rainbow cookie cake into the refrigerator or freezer until the ganache is hardened.
How to Store Rainbow Cookie Cake Before Serving
If serving the same day, remove the cake to room temperature after the ganache seals. The cake tastes best if served at room temperature.
Keep it in the refrigerator over night until the day of serving.
Remove it from the fridge in the morning to allow it to come back to a desirable temperature.

Best Rainbow Cake Recipe
Make this beautiful layered rainbow cookie cake recipe for your next special occasion - easy enough for beginners!
Ingredients
Cake Layers:
- 4 eggs, divided
- 8oz almond paste
- 1 teaspoon pure almond extract
- 1 1/2 cups sugar
- 2 1/2 cups unbleached all purpose flour
- 1 teaspoon baking powder
- 2 1/2 sticks salted butter, softened to room temperature
- Pink, yellow, and green gel food coloring
- Non-Stick Spray
Used During Assembly:
- Apricot jam or preserves
- Seedless raspberry jam or preserves
Chocolate Ganache:
- 1/4 cup heavy whipping cream
- 1/2 cup semi sweet chocolate chips
- Chocolate sprinkles
Instructions
Bake the cake layers
- Preheat the oven to 350 degrees F and grease the style pan you are going to use.
- Take the 4 eggs and separate the yolks from the egg whites in two separate bowls. You should have 4 egg yolks in one bowl and 4 egg whites in the other.
- Cut the block of almond paste into smaller pieces and set aside.
- Using the whisk attachment on your mixer, beat the egg whites on medium speed until they become frothy - about 3 minutes.
- In the stand mixer bowl, combine the sugar with the almond paste until it isn't as lumpy.
- Add the softened sticks of butter, egg yolks, and pure almond extract. Beat with the whisk attachment on low-medium speed until well combined.
- In a separate bowl, mix the flour and baking powder together. Change the whisk attachment to the paddle attachment on the mixer.
- Slowly add the dry ingredients to the stand mixer bowl. Make sure the head of the mixer is locked and turn the speed to medium. The dough will become increasingly thick.
- Add the egg whites to the thickened dough while keeping the mixer speed on medium.
- When well blended, shut the mixer off and remove the bowl. Divide the dough into 3 equal sized balls.
- Add pink, yellow, and green food coloring to each dough ball to color the different cake layers.
- Spread the dough into the prepared pans. A wooden or rubber spatula works well for this.
- Bake the layers on the middle rack at 350 degrees F for 20 minutes or until the edges of the cakes start to lightly brown.
- Check the center of the cake with a wooden toothpick or fork to make sure the middle is baked through.
Let the cakes completely cool in the pans before trying to remove them. I prefer to store them in the refrigerator overnight.
Assemble the rainbow cookie cake
- Carefully loosen the edges of the cake from the pan with a butter knife then flip the pan over onto a piece of parchment paper.
- Using the long serrated knife, trim the tops of the cake layers so they're level with each other. I usually only have to cut off the small rise in the center of the cake to make them even.
- Pink layer of the cake goes on the bottom.
- Spread a thin layer of raspberry jam over the pink layer and add the yellow cake layer on top.
- Spread a thin layer of apricot jam on top of the yellow layer and add the green cake layer on top.
- Wipe away any jam that oozes from the sides of the cake for a smooth, clean appearance.
- At this point, you can continue on to frost the assembled rainbow cookie cake or leave it on the counter for a few hours until you are ready.
- If leaving it on the counter, id put it in the microwave as is if it will fit. It's airtight and offers good preservation from drying out. Use plastic cling wrap with caution as it may cause some parts of the cake to become a bit soggy.
Make and Coat with Chocolate Ganache
- Bring the heavy cream up to temperature until it starts to show signs of a boil.
- Add the chocolate to the pot and stir until you have a smooth, creamy ganache.
- Remove from the heat and immediately apply to the assembled rainbow cookie cake.
- The easiest way to do this is to scoop out large amounts of ganache with a spatula and distribute it evenly over the top and sides of the cake.
- I usually use 2/3 (if not all) of the ganache. The measurements do make a bit extra on purpose in case I need to do any cake patch jobs.
- Some times, even though the layers were flat and even, some spots will look like they're sagging or have a dent in them. These dents can easily be corrected with a thicker spread. There's no such thing as too much ganache.
- Once the cake is covered, add chocolate sprinkles while the ganache is still warm.
- To coat the sides of the cake, I pour sprinkles into my hand and throw it horizontally at the cake wall. It sounds ridiculous but it works well and surprisingly doesn't make much of a mess.
- Put the finished rainbow cookie cake into the refrigerator or freezer until the ganache is hardened.
- If serving the same day, remove the cake to room temperature after the ganache seals. The cake tastes best if served at room temperature.
- Keep it in the refrigerator over night until the day of serving.
- Remove it from the fridge in the morning to allow it to come back to a desirable temperature.
